
Switch Lite Dock
2024-01-21, 17:56:37
I wonder how complicated it would be to build a Nintendo Switch Lite Dock using a Raspberry Pi 5 and SysDVR?
17:57:31
According to Google, some people have done that already, but there aren't any good guides for it.
17:58:27
There's probably better stuff to be done with an rpi5, but I guess that's what mine will do for the time being.
18:00:08
It shouldn't be that hard imo.
There's a guide on how to cross-compile everything needed for SysDVR on ARM.
So I only need a 3D-printed case that looks like a switch dock.
18:00:47
I have everything here I need, except maybe a right-angle USB-C cable for inside the dock.
Lemme order that real quick.
18:04:48
Ugreen advertises some of their Cables with 480Mbps data transfer speed.
Aka USB 2.0.
I have no clue if that makes a difference with SysDVR, it seemed to work fine right now with 2.0 on Windows. But I'll still go with 3.0 just to be on the safe side.
18:06:22
50cm USB-C to USB-A cable acquired.
18:06:54
more or less, that is. It'll arrive on Tuesday.
Then I can design and print a dock that holds everything.
18:14:45
Of course, I won't start with the Raspi part until that's finished because I can't be bothered right now to set it Up.
18:22:20
Ok, so I canceled the Ugreen cable again because I've got another idea:
This should be a real dock, right? So I also want to charge the switch at a "proper" speed.
18:23:02
That's why I bought one of those USB power injectors, so I just can add a second USB-Port on the outside for extra power.
18:23:58
Now it's only USB 2.0, but that shouldn't matter.
TBC on Wednesday.
2024-01-24, 18:48:30
I still haven't gotten all the hardware I need, but the Case is coming along nicely.
18:51:00
Wat's left to do now:
- Put some software on the Pi.
- Print the case
- Wait for the remaining Cables I ordered.
2024-01-27, 15:10:43
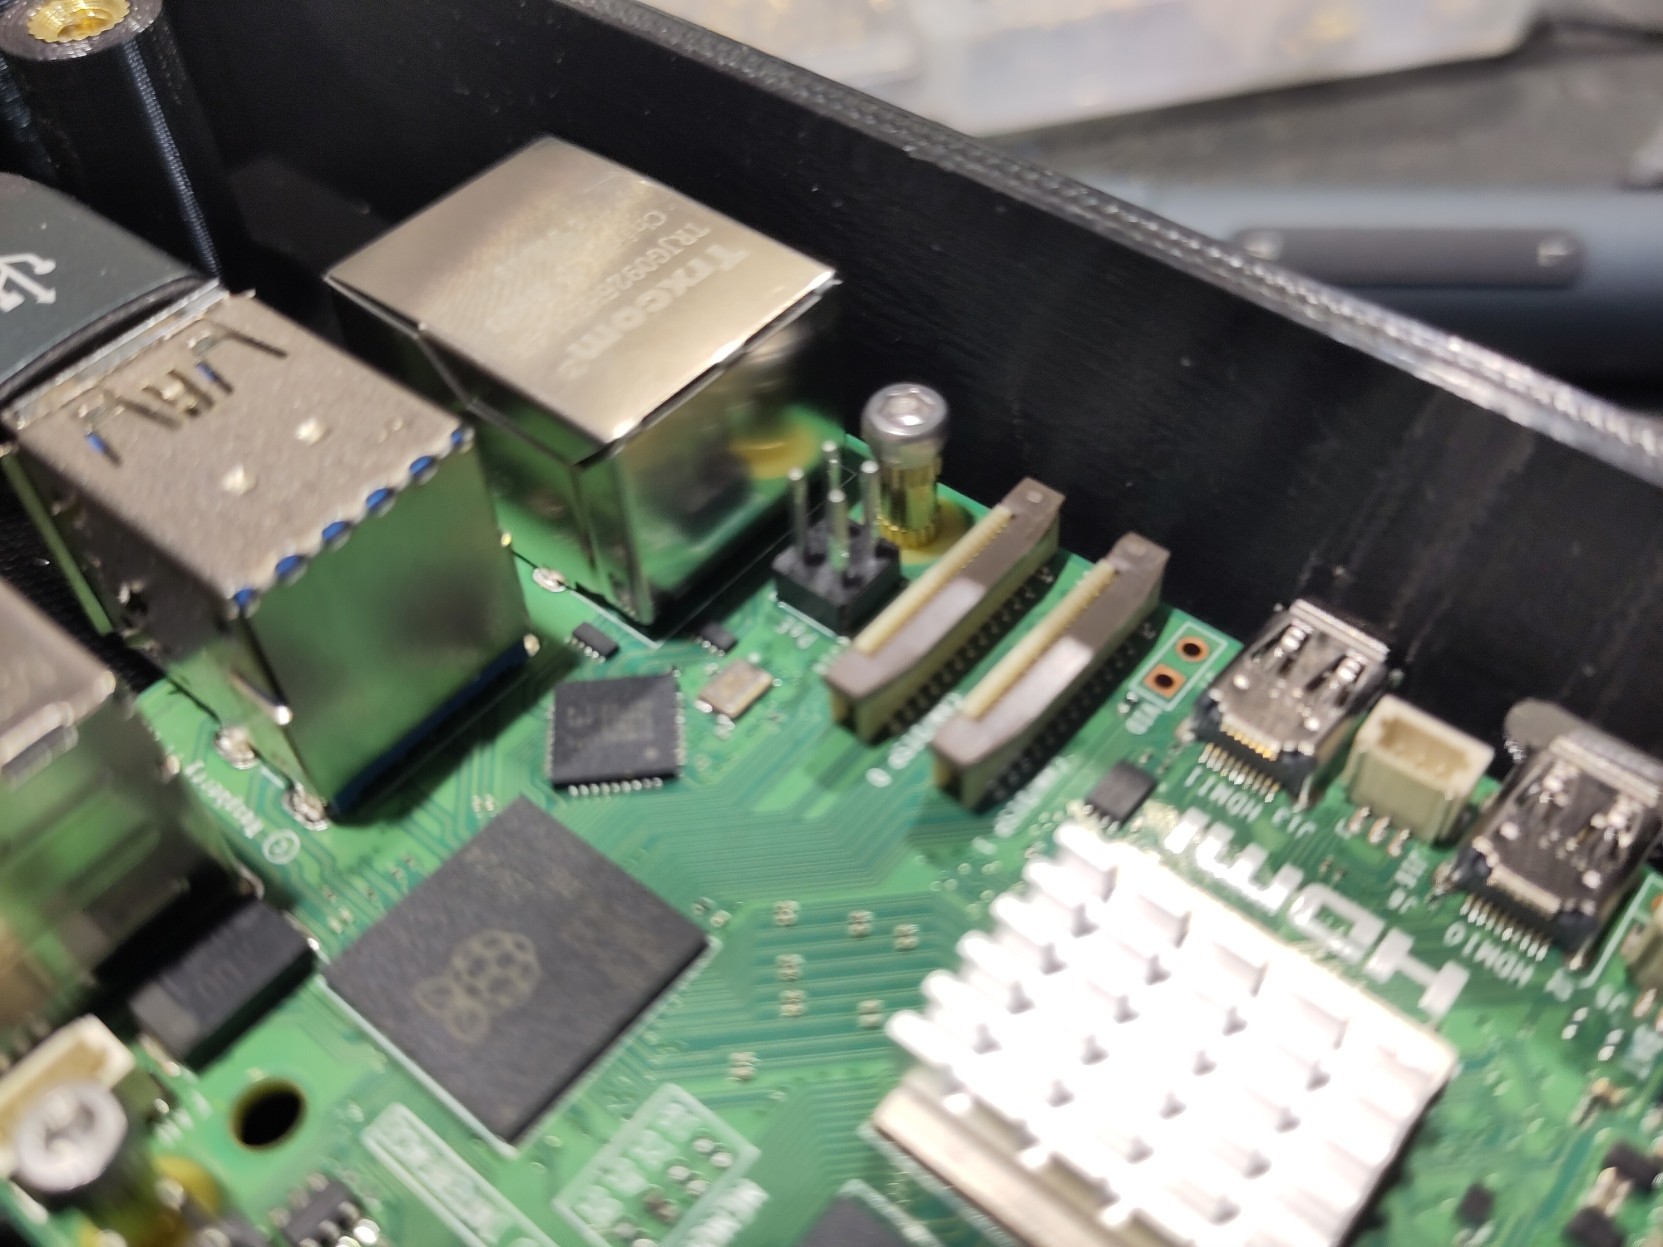
Shoutout to cheap Chinese HDMI capture cards.
15:29:47
Let's start installing SysDVR, shall we?
15:30:14
Here goes nothing.

15:33:36
That was anticlimactic.
I 100% expected Microsoft to do Microsoft things.
It just worked and I don't trust it.
15:40:47
It's going pretty well so far.
The only thing that has been *slightly* complicated was compiling Cimgui.
15:45:14
I feel better now.
Would've been weird if it just worked like that.

15:53:46
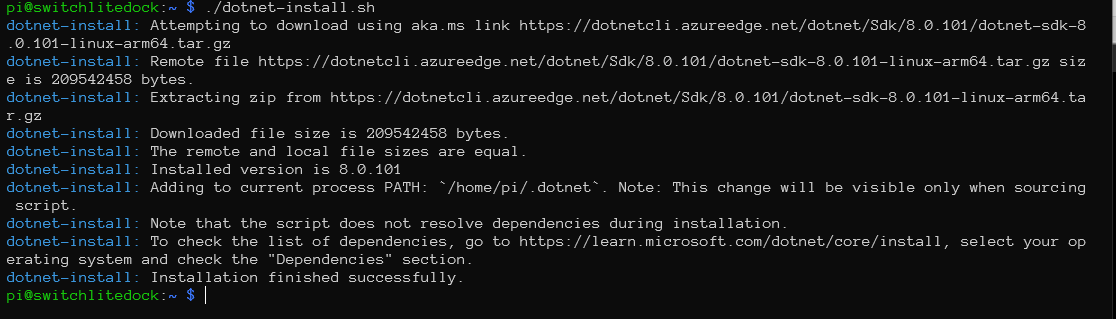
And here's Microsoft doing their thing. As expected.
Their installer doesn't add their bin directory to PATH.
15:54:32
It outputs "dotnet-install: Adding to current process PATH: `/home/pi/.dotnet`. Note: This change will be visible only when sourcing script." while running.
What script do you want me to source Mr Gates? The install script?
16:01:05
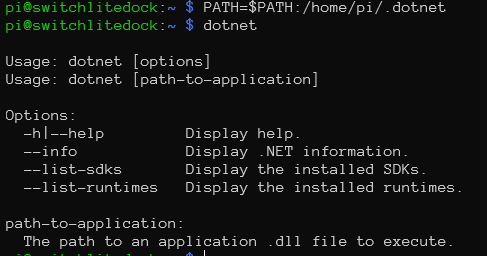
Fixed that, and onto the next issue.
16:15:48
Looks like I'm missing libsdl2-dev. But I'm not.
Lovely.
16:16:41
Oh no.
16:20:25
libsdl2-image-dev is its own package but the SysDVR manual install guide doesn't mention that.
16:21:33
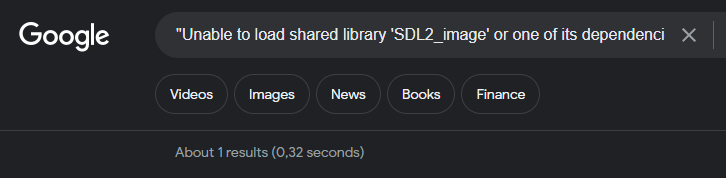
But the single Google result did.
Kind of at least. It was for MacOS but potaito potato.
16:24:55
Oh come on!
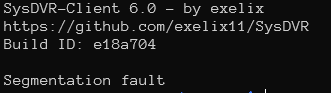
16:26:41
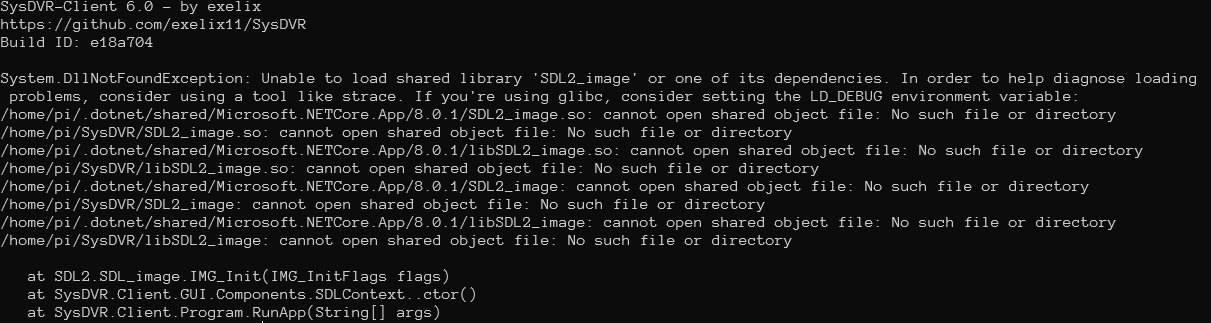
It's not completely screwed up, it looks like.
--help Works.
16:28:41
--debug works too.
System.IndexOutOfRangeException: Index was outside the bounds of the array.
at SysDVR.Client.CommandLineOptions.Parse(String[] args)
at SysDVR.Client.Program.RunApp(String[] args)
16:30:12
Wait, does it crash while parsing the command line options?
That's almost funny.
16:37:02
The Legacy Player works.
Guess I'll use that then.
16:38:47
It's even better with --fullscreen.
16:41:03
Now I just need to figure out how to start it on boot and restart it in case it crashes or exits.
Hey, systemd u up?
17:05:54
Figured it out.
In case anybody stumbles over this thread and wants it:
https://gist.github.com/RealDekkia/c57097de1b5369c02c62bf48f79b060d
17:18:02
Almost got it right on the first try.
Had to add a
```
After=graphical.target
Wants=graphical.target
```
and now it works on boot.
Nice.
17:20:00
I'd love to post a Video, but the Pi leaks my wifi SSID on boot and that's bad opsec.
17:36:01
Two more finishing touches:
Add a wallpaper as some sort of wait screen.
And install unclutter to get rid of the cursor when the desktop is showing.
17:41:19
Perfection.
Unclutter didn't work but I can't be bothered to fix that.
17:42:04
The wallpaper was part of the set Nintendo of Japan sent you in 2021 on your birthday btw.
17:42:52
The lag comes from my cheap capture card. It's better with a real display.
17:43:22
Now I just have to wait for the 3D prints to finish, and I can put it together.
17:45:02
One more thing: Enabling overlayFS to hopefully have it last longer.
18:43:46
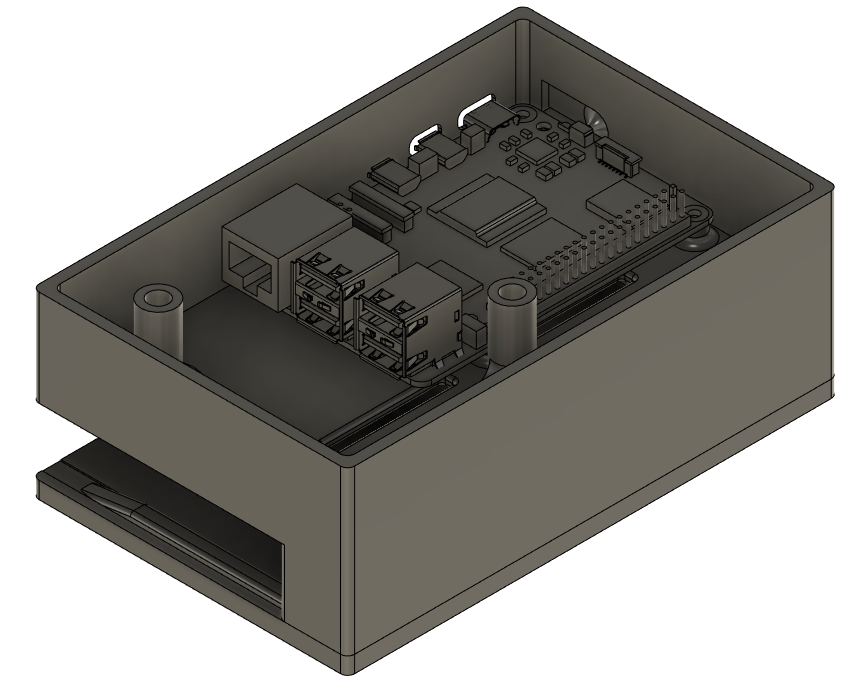
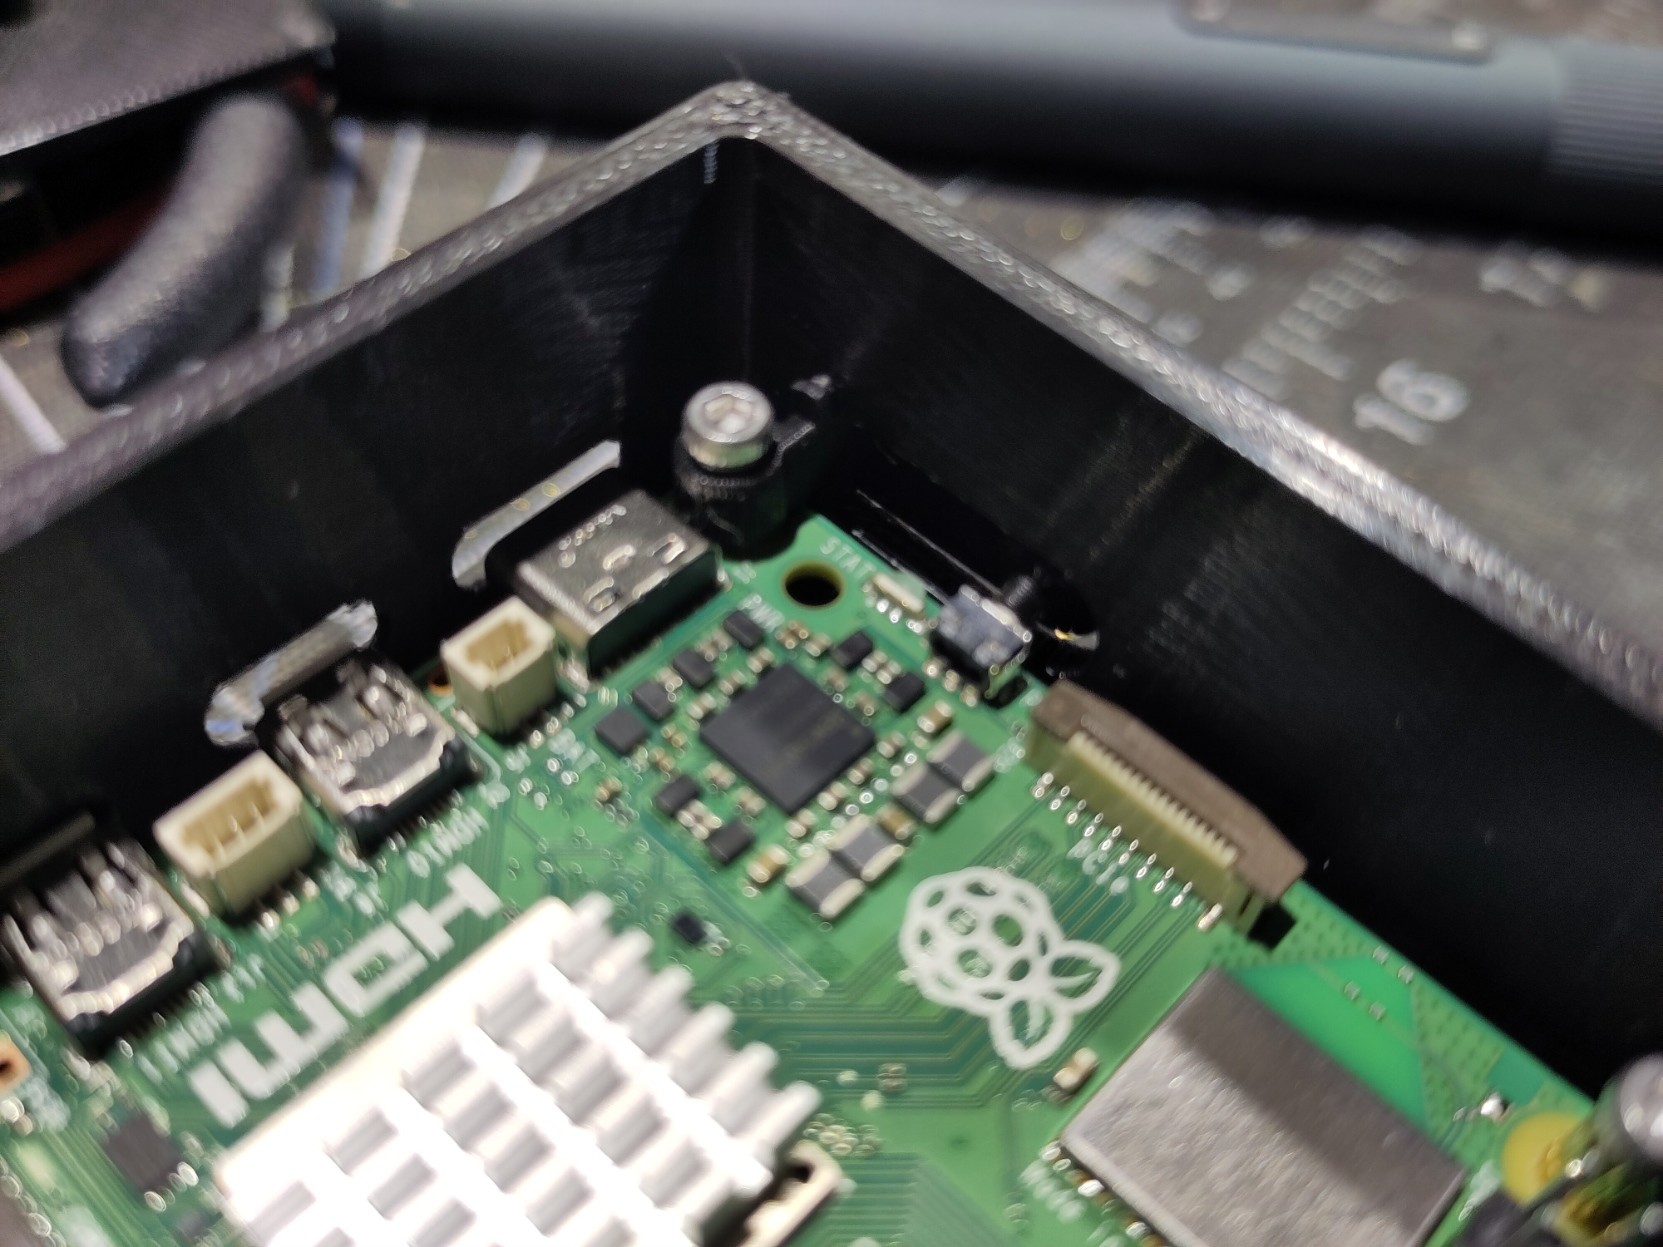
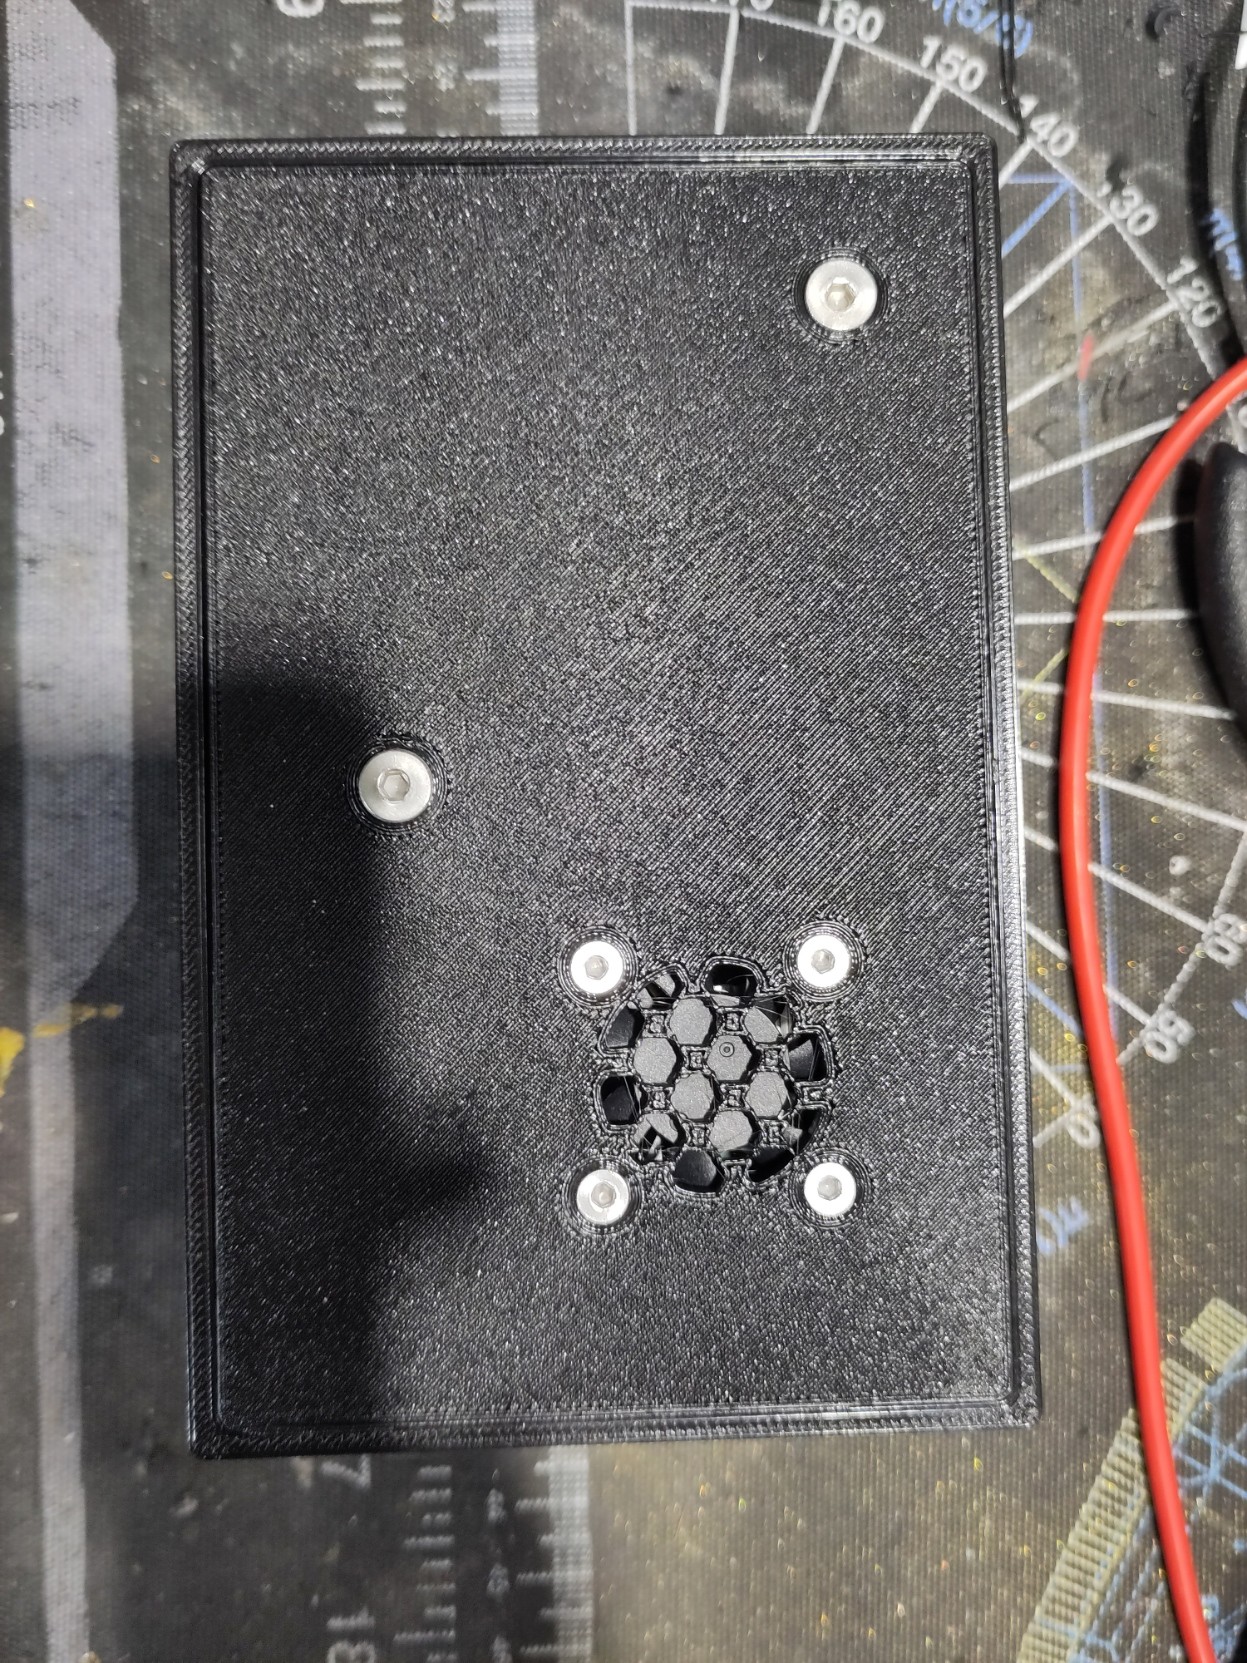
Most of the 3D printing is done and the brass inserts are in.
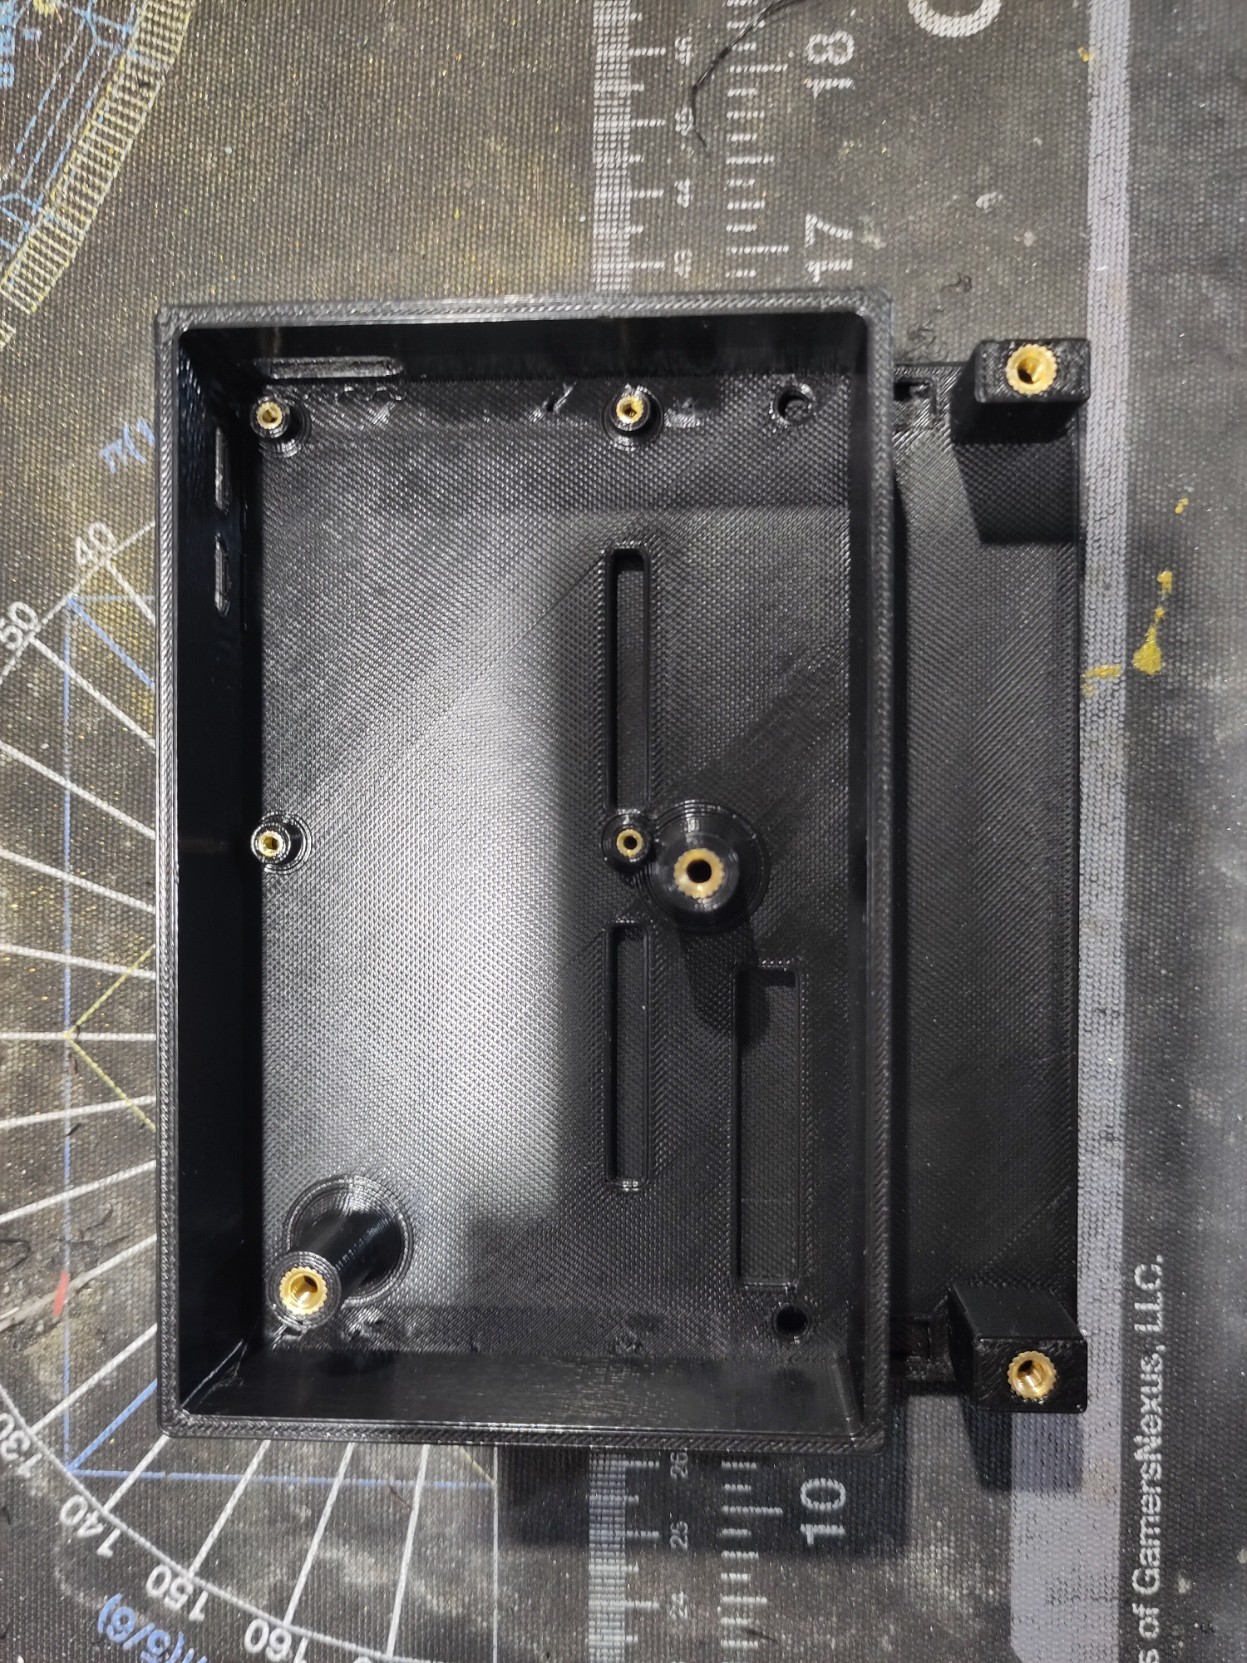
18:56:06
Here's some great jank: The only M2.5 Screws I had are 10mm long. So used M2.5 Inserts as standooffs.

19:01:35
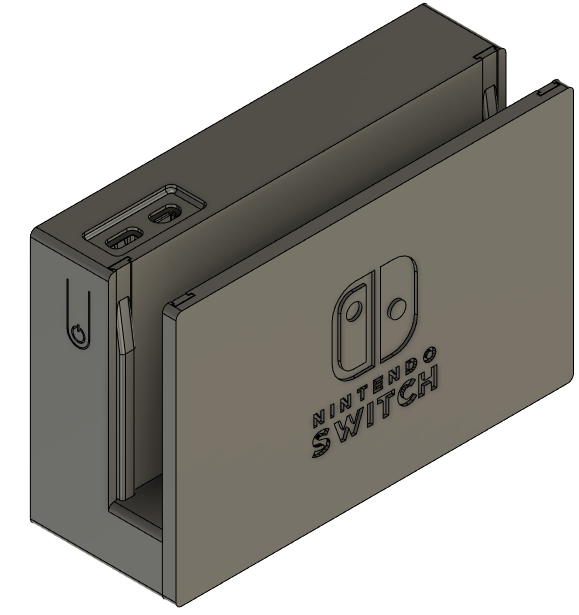
The rails to hold the swicht centered (just like on the real dock) are in too.
Technically I designed them to be replaceable, in practice I had to hammer them in.
Let's just hope I don't need to replace them.
19:06:17
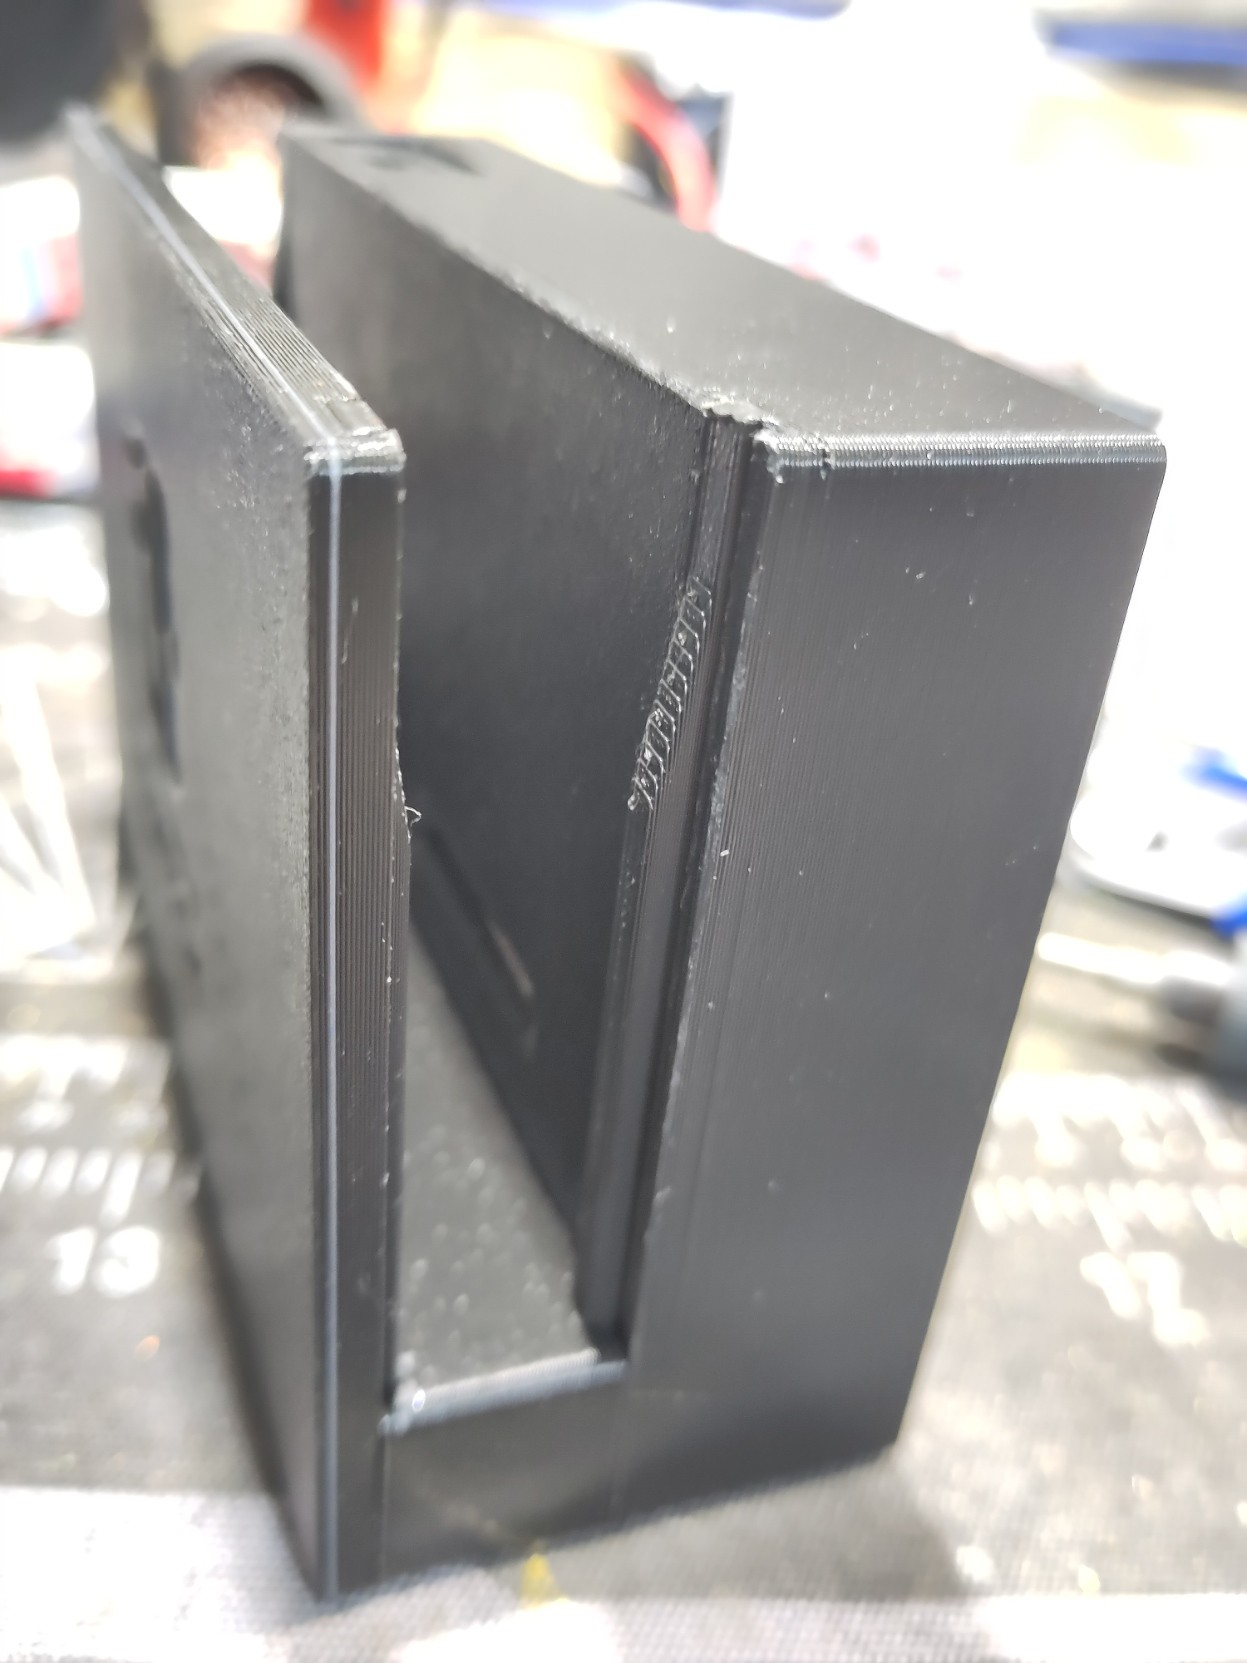
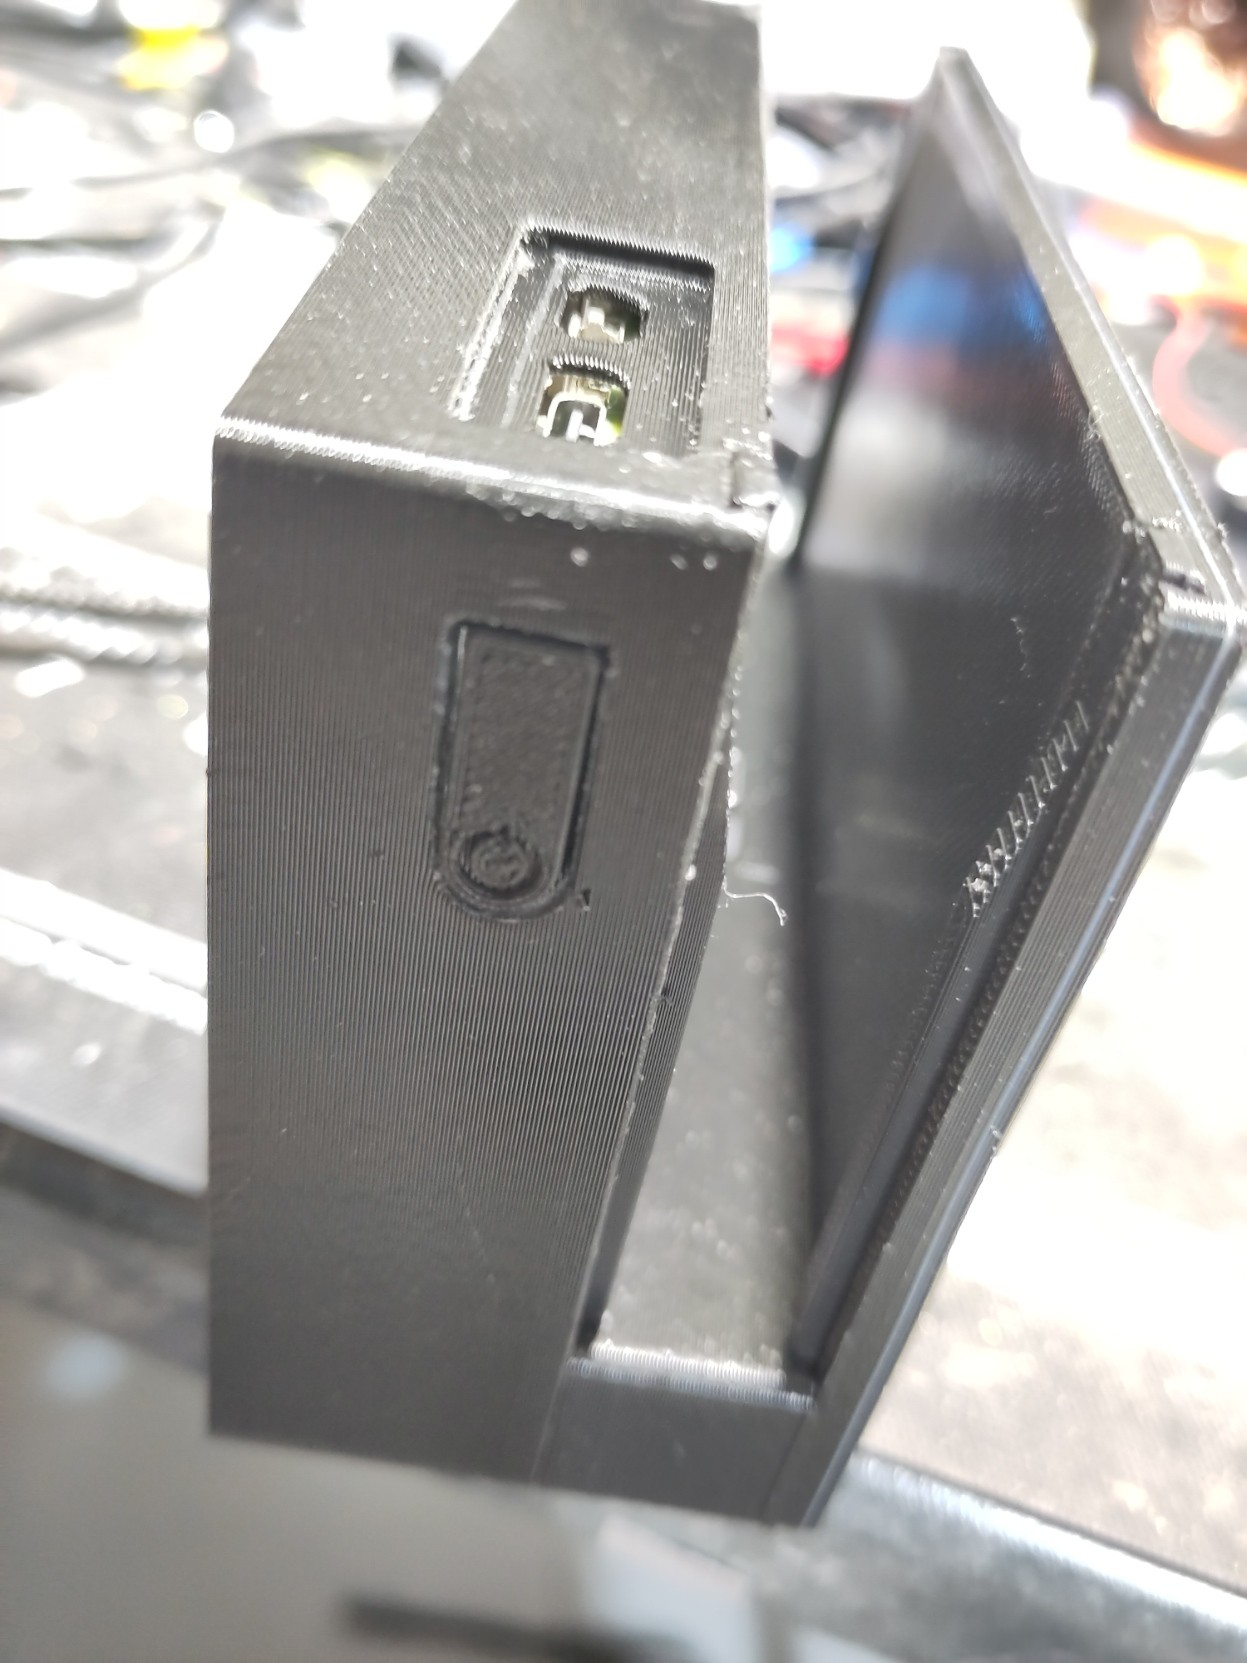
And here goes the Fan.

19:16:04
And here comes the last part fresh of the Print bed: The power Switch.
I printed it separately to align it in a way that makes it stronger.

19:20:31
Closing up the Case was a lot easier than expected.
I was concerned about the Fan cable, but that went smoth.
19:24:01
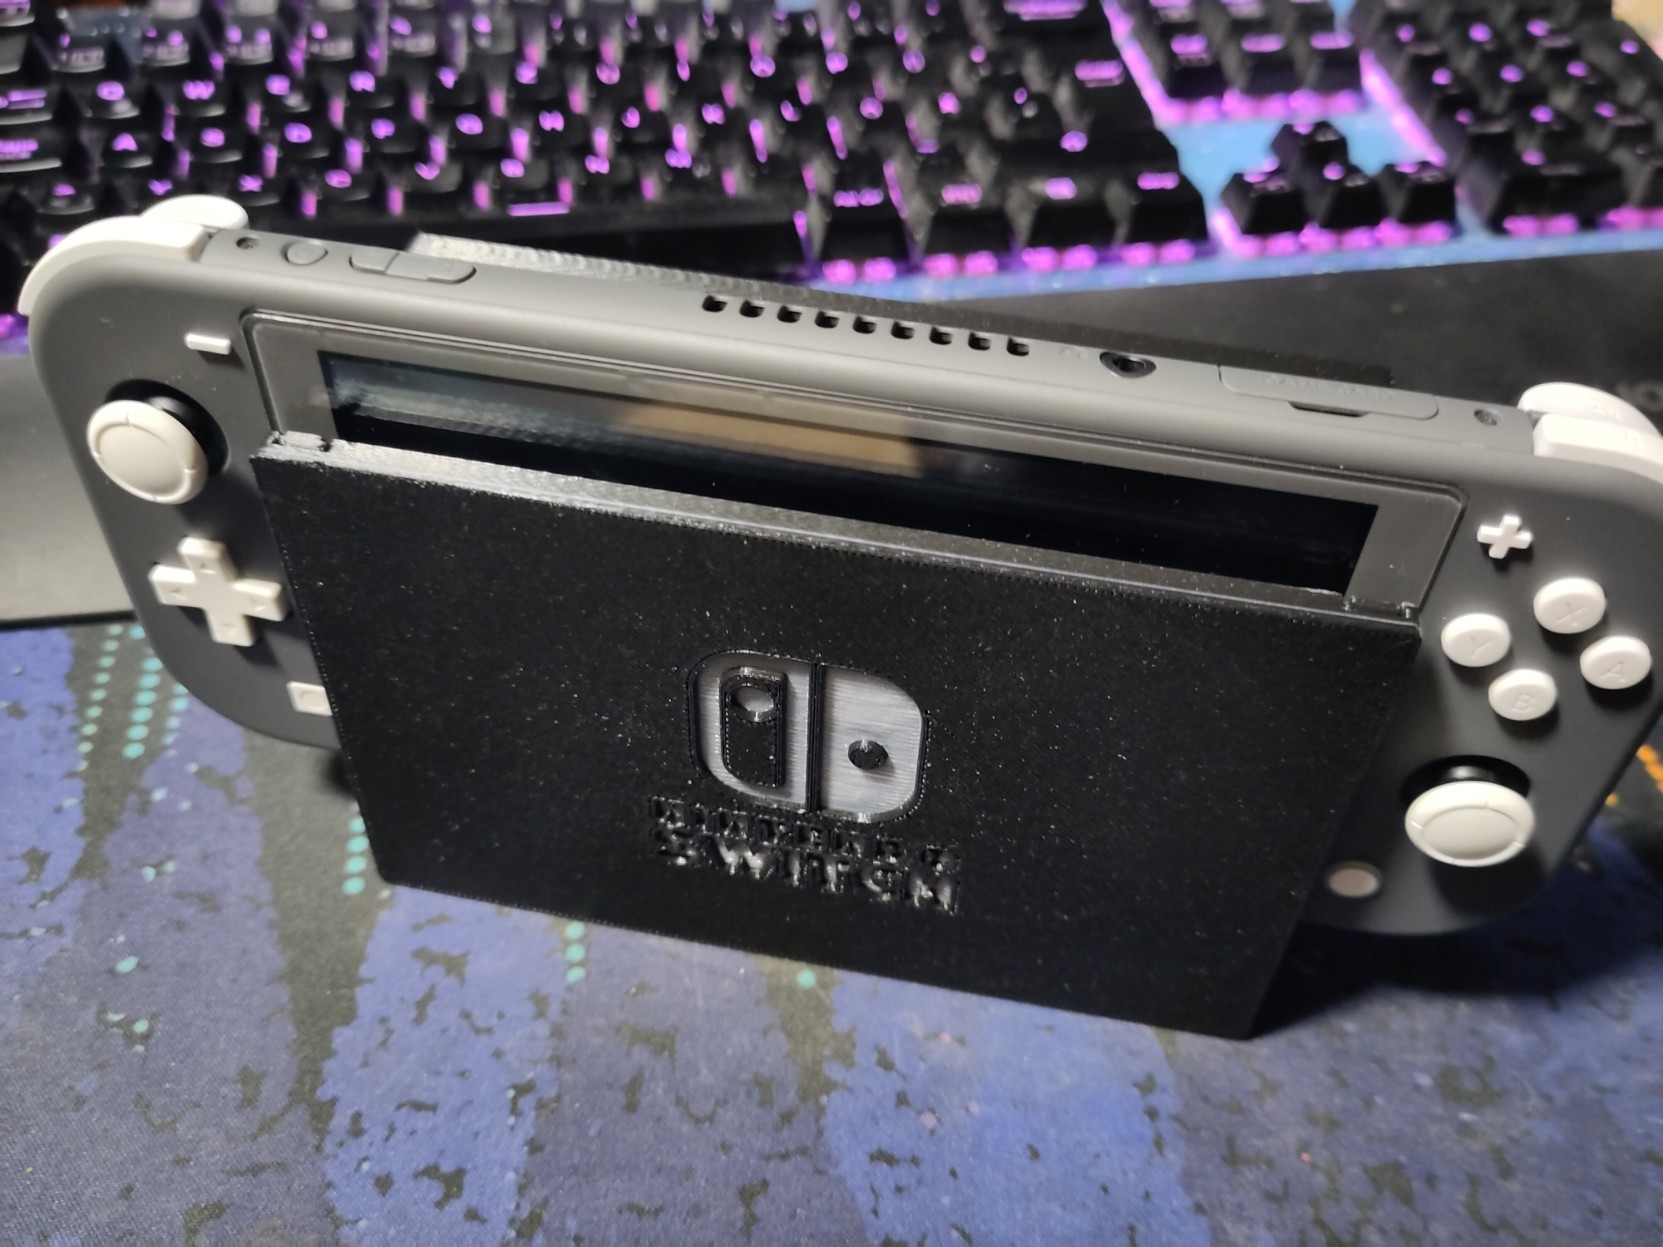
And there it is.
With the switch and everything.
I'll post a Real video of it working tomorrow. But I first have to make spaces on TV cupboard for it and I don't fee like doing that now.
19:50:03
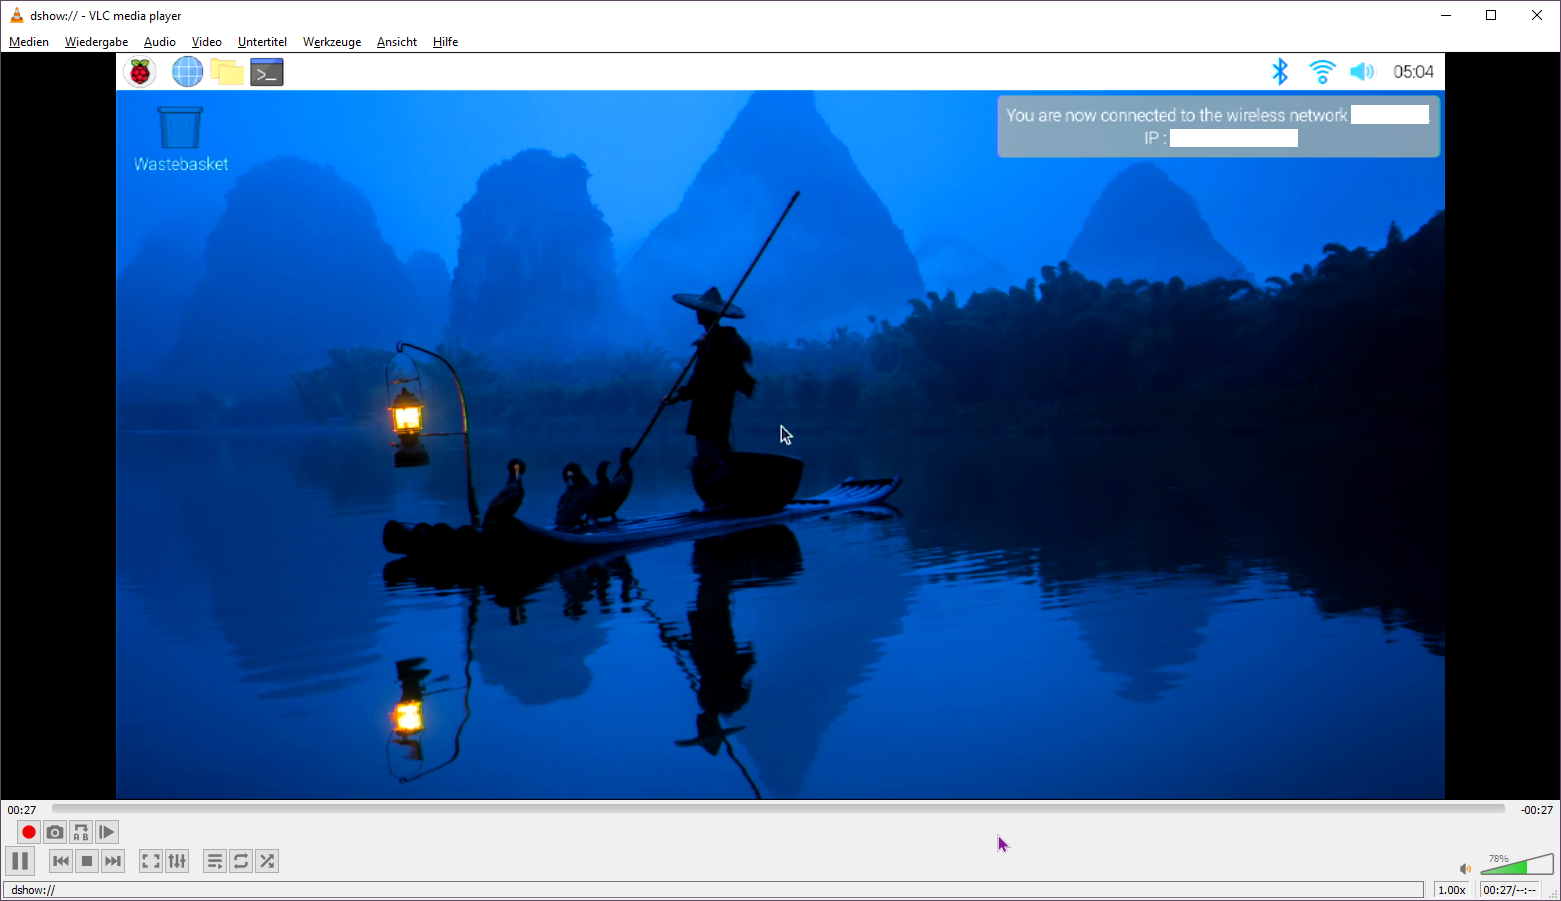
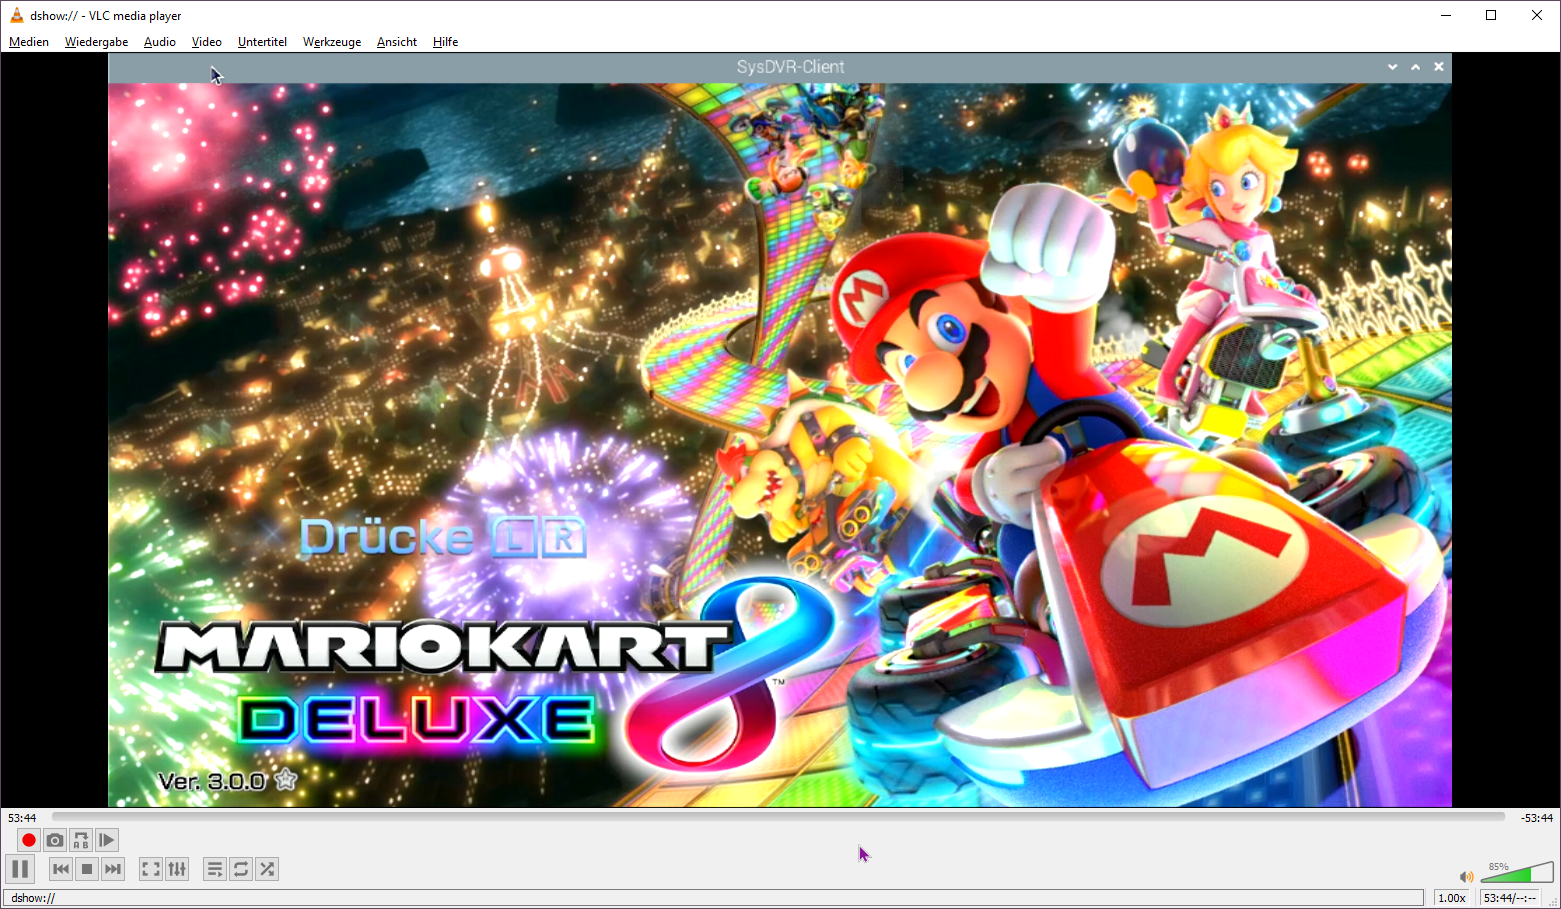
Quickly tested it on my Desktop Monitor.
The latency is not like Smash on a CRT but it's serviceable.
19:54:11
Playing like that also slowly decreases the battery, because It can't charge fast enough over that USB connection.
I'll have to look into fixing that at some point. But it's not a big deal.
2024-01-28, 07:41:10
Video as Promised.
I consider this project done now.